
Maneuvers · · Patrick Saxton
Steep Turns: Why They Look Scary and Aren't the Hard Part
Forty-five degrees of bank and the ground right out the side window. Here's the simple version of how to fly a steep turn to private pilot standards.
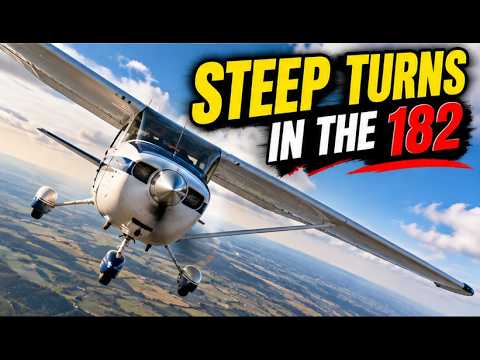
This is the maneuver most people picture when they think about learning to fly. Forty-five degrees of bank, the wing pointed at the ground and the horizon tilted across the windshield.
It looks dramatic. Most new students tense up the first time.
And honestly, it’s not the hard part.
At Essential Skills Groundschool, we teach steep turns on the ground first, so the picture outside makes sense before you ever roll into one.
What a steep turn is
A steep turn is a 360-degree turn at about 45 degrees of bank, at a constant altitude. On the private pilot checkride, the Airman Certification Standards ask you to:
- hold altitude within 100 feet,
- hold airspeed within 10 knots,
- hold bank within 5 degrees,
- and roll out within 10 degrees of your entry heading.
Why do we teach it? Because it teaches coordination, energy management and where to look. Those three skills show up in every phase of flight, including the base-to-final turn on a gusty day.
Why the nose wants to drop
Here’s the simple version.
In level flight, the wing’s lift is pointed straight up and holds the airplane in the air. When you bank, some of that lift is now pulling the airplane around the turn. Less of it is holding the airplane up.
So if you do nothing, the nose drops and you lose altitude.
To fix it, you add back pressure. That increases the angle of attack and gives you more total lift. At 45 degrees you’ll usually add a little power too, because that extra lift comes with extra drag, and without power the airspeed bleeds off.
How to fly it
Clear the area first. Two clearing turns, and look hard for traffic.
Pick a reference on the horizon. A grain elevator, a lake, a road heading off toward the edge of the earth. Something you’ll see again when you come back around.
Roll in smoothly. As you pass about 30 degrees of bank, start adding back pressure and a little power.
Then look outside. Find where the horizon sits against the cowling at 45 degrees and hold that picture. Glance at the altimeter and the attitude indicator to confirm, then get your eyes back outside.
About 20 degrees before your reference, start rolling out. And here’s the step most people miss: as the wings come level, release the back pressure and take out the power you added. If you don’t, the airplane climbs on the rollout. That’s where a lot of altitude busts happen.
The common mistakes
Chasing the instruments. If your eyes are glued to the altimeter, you’ll be correcting late every time. Fly the picture outside.
Too much bank. At 50 or 55 degrees the turn gets a lot harder to hold. Watch the bank angle as you roll in.
Forgetting the rudder. Keep the ball centered. A slipping or skidding turn is harder to hold and isn’t what the examiner wants to see.
The rollout climb. Release that back pressure as you level the wings.
How to practice it
Chair-fly it the night before. Sit in a chair, close your eyes and talk through the entry, the picture, the power and the rollout. It sounds a little silly. It works.
Then go fly them in both directions. Most people find one direction easier than the other. Usually it’s the one where they can see more of the horizon over the nose.
Once you stop chasing the instruments and start flying the picture outside, steep turns smooth out quickly. And when they do, you’ll find you’re a little more comfortable in every other turn you make.
Eyes Outside. Hands Smooth.
At Essential Skills Groundschool, our checkride prep walks through every maneuver against the Airman Certification Standards, so you know exactly what the examiner expects.
Steep turns look dramatic, but they’re one of the most teachable maneuvers on the checkride. Most people get them in a lesson or two once the picture clicks.